Pages

Friday, 23 March 2012

Crafts night – Mothers Day Projects Wednesday 14th March 2012

so it continues.....

Since our first craft night set the standard we decided to continue our meets; to which I am very please about!!

Here are some of our photos from wednesday 14th March, Mothers day project this time; the kids loved making fancy cards :D


Until Easter....... :D

Decorating your Gift Boxes - Idea's


Decorating your Gift Boxes - Idea's

Strip Flower


Spin Wheel


Accordion Flower


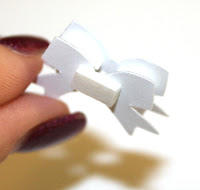
False Ribbon


All tutorials can be found in previous posts.

Gift Box with Lid


Gift Box with Lid

To create a gift box for many of your creations is a simple but effective way to put that extra personal touch to your gifts.

I made my first gift box for one of my 3D frames .... I then used the same template but changed the dimensions for other gifts, it may take time to get it decorated but the actual box itself is simple.

Here is a step by step guide:

Tools:
  • Card to fit box template size
  • Scissors
  • Pencil
  • Ruler
  • Glue
1. Measure and pencil your template onto the back of your preferred card choice

2. Cut out the template

3. Slightly score each edge with your scissors (ensuring you score the right side so the flaps bend in the right direction)

4. Bend scored edges inwards and glue tabs to each section
For the lid, follow the above again but make the base shape slightly bigger (maybe 3mm) and side panels slightly smaller to help it fit correctly.
Decorate to you taste or use some of my examples which will follow in another post.

Decorative Spin Wheel


Decorative Spin Wheel


I found this wonderful design online, a childhood visual on the beach with a colourful spinning wind wheel brings back memories.

I have looked at this design from a different aspect as I really like 3D art at the moment, instead of making the wheel spin I have made it static and sturdy to enable it to be placed on a hard surface.

Here is a step by step guide to creating this gorgeous 3D art wheel:

Tools:
  • Ruler
  • Double Sided Card
  • Pencil
  • Compass (for circle)
  • Split pin
  • Scissors
1. Cut a piece of thin card into a square ensuring all edges are the same size (looks great in many sizes but can get very tricky the smaller you go)

2. Draw a very faint diagonal line from each of the 4 corners and a circle in the middle (you can use any tools available around the house)
    3. Cut a straight line from each corner up to the outline of the centre circle

4. Place a hole in the right hand corner of each section and one in the centre of the circle

5. Pull each section (one at a time) into the centre and place the split pin through each one
6. Once all 4 sections are in place put the split pin through the centre of the card and open the pin at the back to hold in place

If you want to use the pin to place through on to card you can but you can also glue a small circular patch on to the back of the pin wheel covering the split pin to enable you to glue directly onto your project (card, frame, gift box etc)

Project is now complete

Thursday, 22 March 2012

3D Paper Craft Frame (Personalised)


3D Paper Craft Frame (Personalised)
Fabulous homemade gifts for all

I wanted to make a very special present for my boyfriends mum on the birthday of her youngest child and daughter who sadly is longer with us; this was to help celebrate her birth and the life that she lived; unfortunately I was unable to have the privilege to meet with her so I wanted to make something very personal and very special that she could keep close to her heart and in memory on her 24th year.

This was my very first attempt at 3D art and once again it has led me into another magical place in the craft world.


Here is a short step by step guide to creating a 3D Paper craft Frame:

Tools:
  • 3D Frame (can be bought from most stationary & home ware stores)
  • Shaped Punches (various shapes available)
  • Patterned Card/Paper
  • Double sided padded tape
  • White card (size to fit inside of frame)
1. Cut shapes out of your patterned paper using your selected punch shape

    2. Cut your white card to the size of the inside of your selected frame
    3. Place padded tape on to cut out shapes to the required height and ensure one is on the bottom to enable the art to stick to the finished product
    4. Once you have plenty of 3D shapes ready; place them onto your white card and re-arrange until you have your selected shape.
    5. Finally one by one peal off the bottom tape and stick firmly to the card ensuring you keep the shape you need.

The idea can be used for any occasion.... here are some more I made for mothers day.


Project is now complete


Thursday, 15 March 2012

Boyfriend's Surprise Party


Boyfriend's Surprise Party

After a long 3 weeks of organising a surprise party for my boyfriend’s 30th, it finally arrived!!! WHHOOOO

What a day... I took him out for a birthday treat but things didn’t quite go to plan, me being a shopaholic thought that a day shopping would keep us occupied for at least 5 hours...... how wrong was I? In between season shopping is a bad idea; there was just nothing that caught our eyes so the trip only took 2 hours which left me with a few extra hours to play with........ not knowing what to do to keep him out the way I suggested we went for a walk HAHAHA I know he would not be best pleased with this so he suggested we just pop in to Stamford for some more shopping! Great plan ..... but at this point I was getting suspicious that he knew what was going on but WHY was he not questioning me?

We ended up at a very nice hotel called the Royal Oak in Duddington at about 5.30pm, we had planned to have a lovely dinner but were still full from our random lunch at Burger King!! .... not good. So we decided to stay and have a few drinks instead. During this time I went to get changed into my party outfit ..... using the excuse that it was to posh for me to be wearing my jeans hahaha, he thought I was mental but that’s how I roll!

On time and as planned my sister called me to ask if she could lend some cash... I agreed to pop by the pub on my way home to drop it off at which point Kevin turned to me and asked if I wanted to go in for one.... oh yes I said that would be nice. (again suspicions).

Anyway on the way home I dropped in at the garage to get something to give me the chance to make the call ..... ‘I’m 2 minutes away, be ready’.

Upon arrival at the pub we walked in and what a lovely surprise (or was it?) all of Kevin’s family and friends were there to singing happy birthday............... from then onwards is a blur

Here are some photos of the evening events....


................................ P.S. Never Again

Stripe Ball (& flower) Decoration


Stripe Ball (& flower) Decoration

How about this one for old school decorations? .... Do you remember art time in school; maybe around the Christmas period... this design remind me of then when all the kids got together to make a few decorations and then strung them all together to create a wonderfully long ceiling decoration for the class room.
In fact my sister came up with a great new idea for my 3D art collection which can be used in so many ways. Well Done Sis J
Here is a step by step guide to creating this 3D Decoration:
Tools:
·         Ruler
·         Coloured or patterned Card (Thin)
·         Pencil
·         Split pin
·         Scissors or Guillotine

1.       Cut a piece of thin card into a square ensuring all edges are the same size (looks great in many sizes but can get very tricky the smaller you go)

2.       Measure equal amount of strips and mark with your pencil, cut each strip using your scissors or guillotine. (depending on the size of your ensure your strips are not to thick or to short) (e.g 5”x5” card cut into strips of 1cm equals around 13 stripes, 3”x3” card cut into strips of 5mm equals around 16 Strips)

1. Make a small hole at each end of the strips ensuring they are all inline with each other (TOP TIP – create the holes on one end and insert a split pin to hold in place before starting the other end)


4. Do the same with the other end of the strips

5. Start to softly pull your strips round ensuring the outside of the card is the correct pattern.

Project is now complete

continue many times and put each on to a piece of string to make a long decoration
 
 
If you want to make this into a flower as a piece of 3D art keep following the below instructions

1. Once all sections all pulled into place; take out the bottom split pin hold the top pin in place and keep the strips spread out


2. Open the top pin but keep all strips in place, one by one bring the bottom of each strip up to the pin and slide it in to place


3. Do this with all strips and when you reach the last strip; split the pin to ensure it stays in place
 
 
If you want to use the pin to place through on to card you can but you can also glue a small circular patch on to the back of the pin wheel covering the split pin to enable you to glue directly onto your project (card, frame, gift box etc)

Day out with the kids


Day out with the kids

Me and Kevin decided we would take our nieces out for the afternoon as the weather seems to been getting better, it would be a great chance for them to get to know each other... Typical the rain comes and doesn’t want to stop; so we decided that the only thing to do was to get the wellingtons on and umbrellas out and head down to the local country park to feed the ducks.

Look our little monkey's running off into the puddles.

After the ducks not taking any notice of our tempting bread offerings we decided to take a walk back up to the cafe to dry off and warm up but the kids had other ideas.................................


After finishing their lollies we decided to head to asda to buy some rice crispies and chocolate for a dry, warm and messy cake making session.

When we arrived home it was apparent that the kids no longer wanted to partake in cake making so off they went to cause havoc in the play room whilst leaving me to make some gorgeous crispy cakes.

As soon as they were ready I could stop them tucking in.....


5pm .... Ring a ding ..... HOME TIME

What a day of joy J ... hopefully next time the weather will be on our side!